Building the Orx Library with Xcode on Mac OS X
You can build the Orx Library using Xcode. Be warned, Xcode is a fickle mistress, so unless you already know and love Xcode, I recommend Codelite, or plain gmake for building Orx.
I assume you have already cloned Orx. If not, follow this guide first: Cloning and building the Orx library on the Mac
When Orx is first cloned, and the setup.sh script has been run as per that tutorial, you will have a convenient Xcode project ready for you.
Start by loading the Orx project with Xcode. You can find this located at: orx/code/build/mac/xcode.
Click the Build option in the Product menu. This will build the Debug version of the Orx library.
Confirm this has been built by opening Finder and visiting: orx/code/lib/dynamic. You'll see the liborxd.dylib library file. The d in the file stands for Debug.
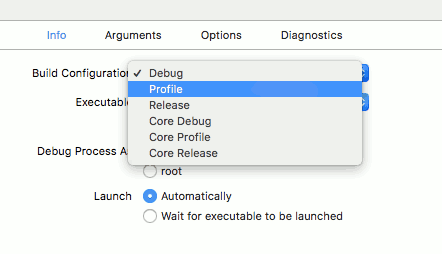
Now compile the Profile version of the Orx Library by clicking the current Scheme of orx > My Mac, and selecting Edit Scheme.
Here you can see the Scheme settings. Ensure you are on Run on the left, and the Info tab is selected.
Change the Build Configuration to Profile, and click Close. Select the Build menu again.
The next library will be available in the orx/code/lib/dynamic folder:
Lastly, make the Release version of the Orx library by clicking the orx > My Mac Scheme, and Edit Scheme, then changing the Build Configuration to Release
Click Build in the Product menu.
Finding our Orx libraries
These are saved to the orx/code/libs/dynamic folder. Use finder to take a look at the output:
You can see the liborx.dylib, liborxd.dylib and the liborxp.dylib versions.
Well done. You have compiled the Orx library which can now be used in your own game projects.
Now we are ready to make a game project of our own.


