Table of Contents
Preparing for a release under Windows
The following acts as a tutorial and a reference checklist for preparing your build for release and packaging for deployment. It covers preparing and inserting an icon for your executable, a checklist of things for your config files, and finally to create a setup.exe.
Also check Common Release Checklist for a number of other things you might like to consider when packaging your release.
Checking Library Dependencies
Orx on Windows depends on libgcc and libstdc++ being compiled in statically, which it is. Your project needs to have these two libraries compiled in statically too, in order avoid the user being prompted when running your application.
These libraries are supplied as part of the Microsoft Visual C++ Redistributable.
Any project you create using init should already be set up to compile in these libraries statically. If your project isn't, you can add the following to your linker options: -static;-static-libgcc -static-libstdc++.
This step should not be necessary for Visual Studio users.
Code and Config pre-flight checklist
- Ensure that your [Resource] section has paths that will locate your config when you repackage your binary, configs, assets and DLLs. For example:
Texture = ../../data # ./data
- Remove any test features from your code.
- Copy your bin and data folders to a new location. Remove any files that aren't needed. Remove orxd.dll and orxp.dll. Only orx.dll is needed for release.
- Test your game .exe and ensure it works correctly with the folder structure changes.
Icon for your .exe
First, create your own icon for your program, using something like Gimp. Gimp can also write out the .ico file format.
You'll need a resource.rc file added to your editor of choice. Things are easier in Visual Studio, but for Codelite, you can follow these steps:
a) Create a .ico icon file, copy it to your src folder, and import it into your project. Right click the icon file and “Exclude from Build”. b) Create an empty resource.rc (just a text file) file in the src folder, and import it into your project. c) Create a reference to the icon by entering the following into the resource.rc file:
MY_ORX_GAME_ICON ICON "icon.ico"
d) In your main code file, add the following #define line (after your #include lines):
#define MY_ORX_GAME_ICON 1
e) Compile, then check your executable file in file explorer. Your .exe should have an icon.
Creating your Setup Installer
- Download the Inno Setup Compiler http://innosetup.com.
- Launch it.
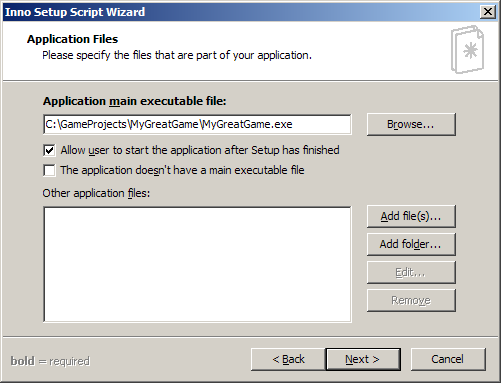
- Select the wizard option and work through the screens:
- Click “Add Folder”, and select the base folder of your game (bin and data are the subfolders).
- Say yes that files in the subfolders should be included.
- Choose options for the user, ie, the start folder name, uninstall icon, quick launch icon, information files to show to the user, etc etc.
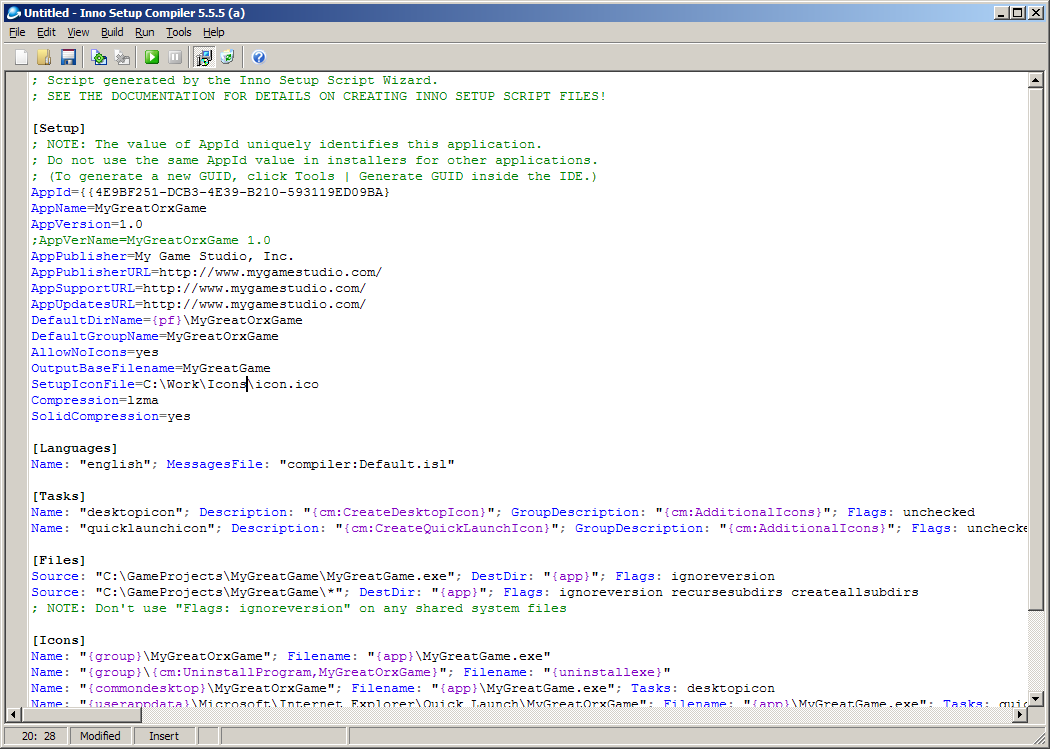
- You can then nominate an installation icon for the setup.exe to use.
- Save the .iss script for later editing if need be.
- Select Build/Compile to create your Setup.exe to give out to the world.
That's all.


